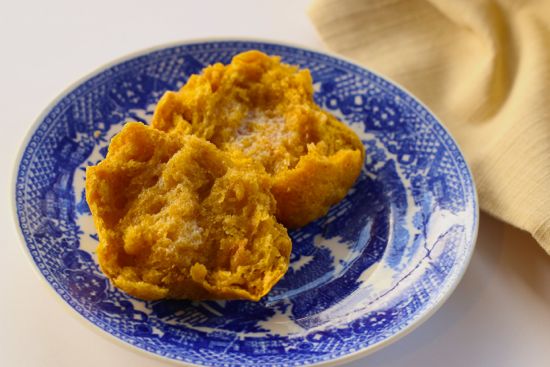
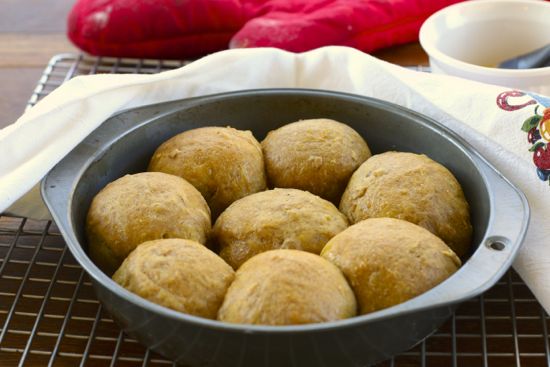
The finishing touch for any Thanksgiving feast is warm homemade rolls on the table.
Far too often, though, it’s the last straw for the harried cook. Who has time to wait for rolls to rise when you’re up to your elbows in turkey, pies, salads and vegetables?
Jeff Hertzberg and Zoe Francois have the solution: make your dough ahead, stash it in the fridge, and bake it off with only half an hour resting time before it goes in the oven. You even can take it a step further and partially bake the rolls until they’re almost done. Then pop them back into the oven to brown while the turkey is resting before it’s carved.
I’ve been a fan of their process ever since “Artisan Bread in Five Minutes a Day” came out in 2007. Now they have an updated edition, “The New Artisan Bread in Five Minutes a Day” (St. Martin’s Press, 2013) with a slew of fresh recipes and ideas. Some are a little wild–bake bread in a slow cooker anyone? Others are very useful, such as the section on gluten-free breads.
I’ve converted their Oatmeal Pumpkin Bread into rolls for Thanksgiving this year. It’s a snap to make, even if you’ve never worked with yeast before. The pumpkin makes it a natural for the holiday table while the oatmeal adds body. A touch of rye flour and the fermentation from time in the refrigerator introduce a pleasantly sour note.
Because these contain whole grains, they’re sturdier than the traditional soft and squishy dinner rolls of my youth. That’s a good thing. These days I prefer my bread to be a little more substantial.
Fresh out of the oven, the rolls are nicely fluffy inside and will stand up to the rest of the menu rather than disappear into the background. Add a pat of good unsalted butter and I’m happy.
Just think how much better they’ll be when they’re stuffed with leftover turkey and cranberry sauce.
- 2 cups lukewarm water
- 1 tablespoon granulated yeast (See Note)
- 1 tablespoon kosher salt
- 5 tablespoons unsalted butter, melted and cooled slightly
- Plus 2 tablespoons butter for brushing rolls
- ⅓ cup honey
- ½ cup old fashioned rolled oats
- 1 cup pumpkin puree
- ¾ cup whole wheat flour
- ¾ cup rye flour
- 4 cups all-purpose flour
- Mix yeast and salt with water, 5 tablespoons of melted butter and honey in a 6-quart bowl or lidded (not airtight) food container.
- Add rolled oats, pumpkin puree, and flours and stir with a wooden spoon until all the flour disappears into the dough. Do not knead. You may, however, find it easier to mix all the ingredients together if you use wet hands to incorporate the last bit of flour.
- Cover the container lightly and allow to rest at room temperature until the dough rises and collapses (or flattens on top), approximately two hours. You may use the dough immediately after this initial rise but taste better with some time in the refrigerator and will handle easier when cold. Dough can be refrigerated and used as needed over the next seven days.
- On baking day, butter one or more 8-inch round baking pans, depending on how many rolls you want to bake. A pan will hold eight rolls.
- For each pan, cut off a 1-pound ball of dough, about the size of a grapefruit, and divide into eight 2-ounce pieces. (A kitchen scale helps immensely with this step.) Quickly shape each piece of dough into a ball, stretching the top smooth and pinching the dough together on the bottoms, and place in the baking pan, bottom side down.
- Preheat oven to 350 degrees and allow the rolls to rest for 30 minutes while the oven is heating. Just before baking, Melt the remaining 2 tablespoons of melted butter and use it to brush the tops of rolls before putting them into oven. Bake until golden brown, about 30 minutes.
- If you like, you can partially bake the rolls ahead of time. Remove them from the oven when they’re just starting to brown and firm to the touch. Return to the hot oven before serving and allow to brown completely.
- Brush again with melted butter and serve slightly warm if possible.
- Note: Use whatever dry yeast is available, whether it’s labeled granulated, active dry, instant, quick rise, or bread machine yeast. It all works well.


Hi Aleta — just checking — no kneading and just two hours of rising time? does it need to rise in a warm place? the flavors look great but i’m worried about execution. love reading your columns.
heather